Showing posts with label birthday card. Show all posts

Wednesday, February 15, 2023

Another Birthday with Taco Fiesta

 Hello, Hello!

I am overdue for another blog post and although I've been creating many other things, I find myself sharing another fun and festive birthday card for my dear husband using the Taco Fiesta Stamp Set. Because, why not?!

This time around, I went with a fun fold card that is not as complicated as it may seem. However, it was a little tedious to decorate because of how you need to lay things out in order to be able to open and close the card.


The Triple Cube Pop-Up Card template is CASED from Meg Loven at lovenstamps.com. She provided instructions plus a video on how to put this together. 

Card-making Tips:

  • use the Layered Stripes background stamp to heat emboss onto a piece of Sahara Sand cardstock using white embossing powder. Cut this into (6) 1-5/8" x 1-5/8" squares and adhere to the assembled boxes using tape adhesive.
  • Use the Conversation Bubbles Bundle to add some words to your fun characters as shown.
  • The "happy birthday" sentiment is from the Biggest Wishes stamp set and was heat embossed in white onto Coastal Cabana Cardstock and Pool Party cardstock.


Card-Making Supplies:

Below is a list supplies used for this project aside from adhesives.


Thanks so much for stopping by today and as always, you are welcome to comment below and let me know your thoughts on this Triple Cube Pop-Up Card.


Thursday, January 26, 2023

Birthday Card using Taco Fiesta

 Hello Crafty Friends! 

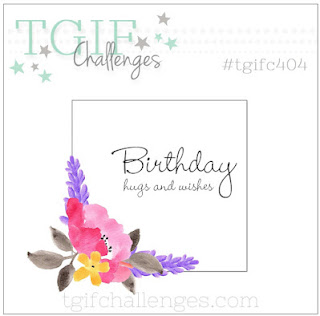
I'm quickly jumping on to share a recent card I created just in time for this week's TGIF Challenges #404 - birthday cards.


My take on the birthday card didn't have anything to do with the sketch shown besides the birthday part of it and that's because...

The Taco Fiesta stamp set is one of my favorite sets in the 2023 Mini Catalog by Stampin' UP! so I HAD TO use it for my brother's birthday card!

I love creating shaker cards and birthday cards are always the perfect excuse for making them! In combination with the Stampin' Blends, the Taco Fiesta stamp set and the Dandy Designs DSP (FREE thru Feb. 28th), this is such a fun card!

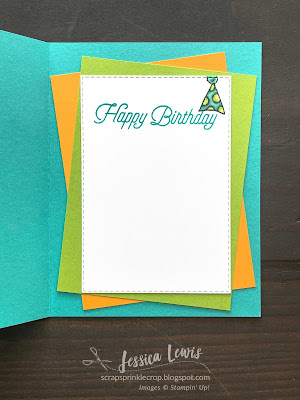
Don't forget to finish off the inside and stamp on the envelope before you put all your supplies away! For the inside of this card, I trimmed off the top flap of a 3"x3" envelope so I can include a little cash inside as my brother's birthday gift.

The "happy birthday brother" is from the Best Family Ever stamp set. Love everything about this greetings stamp set since it's so versatile!


Cardmaking Supplies:


Thanks so much for stopping by to take a look at this week's creation! Don't hesitate to comment below on your thoughts about the Taco Fiesta stamp set. 

Until next time ...


Wednesday, October 19, 2022

A peek at "Fitting Florets"

 Happy Wednesday!

I'm so glad I can get back into working on my own card creation after a busy two weeks of preparing for other events.

This week I'm joining in with TGIF Challenges #390 with a Sketch Challenge!


I chose to use a Collection that has not yet been released to the public, called the Fitting Florets Collection. This collection will soon be available for purchase beginning Tuesday, November 1st. These are an early release collection of products from the January 2023 Mini Catalog. 

The card I created is flowery and elegant with the soft combination of colors that are included in the Designer Series Paper (DSP): 


It was hard for me just to focus on one design in the DSP since they're all so beautiful! However, I did use both sides of this DSP. While playing with the sketch, I chose to turn it 90degrees (clockwise) then add a few flowers and leaves to represent the scalloped edge in the sketch. I'm happy with the turnout, how about you?!


Card-making Tips:
  • Cut the background piece of DSP to 4-1/8"x5-3/8". Use the plaid design from the Artistic Mix Decorative Masks to add a subtle touch of Soft Succulent ink to the DSP with a blending brush. Also add some splatters of white ink, randomly on the DSP.
  • Mat the finished piece of DSP onto a Basic White piece of CS that measures 4-3/16" x 5-7/16".
  • The flowery side of the DSP measures 3" x 4" and is mounted with dimensionals towards the top middle of the card front. This is so that the leaf pieces can slide under the left side of the DSP.
  • Stamp the leaf images using Balmy Blue ink onto Basic White cardstock and also Balmy Blue cardstock then cut out with the coordinating dies. 
  • Stamp the other "leaf" images using Blushing Bride ink onto Basic White cardstock and Blushing Bridge cardstock then cut out with coordinating dies.
  • The oval frame was cut from vellum, the flowery DSP, and Basic White cardstock.
    • Use some Soft Succulent ink and a blending brush to add some ink to the oval frame that was cut from Basic White cardstock.
    • The sentiment was stamped onto the vellum with Versamark ink then heat embossed with gold embossing powder.
  • The finishing touch on the card are the embellishments: Gold Adhesive Backed Swirls.


Card-making Supplies:

The supplies listed below does not include the products from the Fitting Florets Collection. Stay tuned for the release of this collection on November 1st.


Thank you SO MUCH for joining me today and I do hope you are looking forward to getting your hands on this elegant collection of products!

Until Next time... 


Monday, July 4, 2022

4th of July Sampler & matching card

Happy 4th of July!!!

I've got some fun 4th of July projects for you today as we celebrate 246 years of independence in America!

I was inspired by a fellow Stampin' UP! demonstrator, Michelle Haney, to create a 4th of July sampler frame using some retired products and lots of fun and new products from the 2022-2023 Annual Catalog by Stampin' UP!. This was perfect for a birthday gift that I plan on giving to my dear friend for her milestone 4th of July birthday!

I will share her sampler project as soon as she gives me the "okay".

As I worked on putting together my own, I chose to work on a different set of colors to make it bright and sparkly: Poppy Parade (red), Pacific Point (blue), Basic White and white glimmer paper. 


I wish you could see this frame in person because this picture does not do it any justice! There's lots of sparkle throughout as I tried to incorporate the white glimmer paper and rhinestones. I do LOVE the finished product and am so excited to gift it to my friend!

Frame Making Tips

  • The frame itself is from the Celebrate Today Magnet Board Kit, which is  12"x12".
  • The Poppy Parade squares measure 3-1/2".
  • The Pacific Point squares measure 3-1/4".
  • The Basic White squares measure 3-1/8". 
  • In order to place your squares evenly on the frame, use an erasable marker to mark 3/4" margin around the frame-base as a guide. Place the 4 outside corner pieces first, then the 4 outside-edge pieces, then the center piece last.   

Here's a closer look at each piece:

Top Left
Striped paper from Sun Prints DSP (3" x 2-1/8"), 
sentiment from Cottage Rose stamp set.
Heart was punch out using Heart Punch Pack.

Top Middle
Stamp the cork image from
Bottled Happiness stamp set onto back
of Specialty Cork Paper (retired) then cut out.
"Bottle" is filled with Effervescent Elements.

Top Right
Swirly Stars cut from White Glimmer Paper 
using the Stitched Stars dies (retired).
Poppy Parade strips are 1/4" x 3-1/8".
"USA" from Alphabest Bundle.

Middle Left
Background uses Painted Texture embossing folder.
Bear image from Happier Than Happy bundle and
stamped using Crumb Cake ink.
candle from Sentiment Silhouette dies.
"July 4" from Alphabest bundle.


Center
White Glimmer Paper square - 3"x3".
White Glimmer Paper banner and
White stitched square is cut using Stylish Shapes dies.
Sentiment uses the Alphabest Bundle.


Middle Right
Background uses Merry Melody embossing folder.
Stitched circle is from 
Stylish Shapes dies.
White Glimmer Paper shapes and sentiment
from 
Charming Sentiments Bundle.


Bottom Left
Background uses Rays of Light Stamp.
White Glimmer Paper
stars from 
Stitched Stars dies (retired).
Sentiment from Charming Sentiments Bundle.

Bottom Center
This uses the Cheerful Basket Bundle and the
Charming Sentiments Bundle
Hearts were colored using Poppy Parade Stampin' Blends.

Bottom Right
 The stitched square uses the
 Stylish Shapes dies.
The stitching was cut out from square.
Flower image is from Bottled Happiness stamp set.
Sentiment is from Alphabest stamp set.

Frame making Supplies

Other than a couple of the retired products and the basic tools and adhesive, below is a list of supplies I used for this project.


40th Birthday Card

I couldn't make the framed sampler without making my friend a matching birthday card and just had to CASE fellow Stampin' UP! demonstrator, Tammy Wilson, for this fun and festive card. She has an AMAZING talent for layers and design! You can view her creation, here.

Below is my version of the same card:


Considering the time it took me to create the sampler frame, it felt like this card came together pretty quickly! I wish I would've distressed the paper like Tammy did in her card but I believe it still looks cute, don't you think?!

Card Making Tips:

  • The card base is an A2 size from Thick Basic White Cardstock.
  • The background piece measures 4-1/8" x 5-3/8" and was embossed using the Timeworn Type embossing folder.
  • The Sun Prints DSP piece measures 3-3/4" x 5".
  • Use Shimmery White paper that measures 3-3/4" x 5" to blend some Pacific Point ink in the center using a Blending Brush. I followed Tammy's instructions on the background.
  • The Glimmer white pieces except for the swirl is from the Sentiment Silhouettes dies. The swirl is leftover from the top right piece of the framed sampler.
  • The Poppy Parade twine is retired from the 2022 Jan-June Mini Catalog.
  • The clear epoxy dot embellishments are retired from the 2022 Jan-June Mini Catalog.


Card Making Supplies:
All other current supplies except for basic tools that were used are listed below.


Thank you so much for joining me today and I do hope that you enjoy your 4th of July holiday with some extra time to do some crafting!!!

Feel free to share with me your comments and thoughts on today's projects in the section below along with what you do to celebrate the 4th!

Until next time ... 


Wednesday, April 27, 2022

Make a wish with Party Puffins

 Hello Crafty Friends! 

Welcome to this last week of April's blog post and it's all about Making A Wish using TGIF Challenge #365.


At first look, I pictured the following colors in my mind: Copper, Coastal Cabana, Blushing Bride, Fresh Freesia, Basic Black and Basic White.

I knew the background had to be interesting and eventually thought of creating a bokeh background using some of those colors. 

After playing around a bit, this is what I finally came up with.


Cardmaking Tips:

To create this card, it took some special methods and is best explained in a video so checkout my video tutorial below on how I put this together. 


Cardmaking Supplies: 

Use the following link to view the supplies used for this card project:

One particular tool I used and I love, the Grip Tweezers, is not a Stampin' UP! product but you can find it on Amazon.


Thank you SO VERY much for joining me this week! 

Until next time ... 


Tuesday, February 22, 2022

#TGIFC356 - Sale-a-Brating with Awesome Otters

 Hello & Happy TWO's Day!

I've got a cute card to show you that features TWO fun stamp sets (see what I did there?!): Awesome Otters stamp set and the Special Moments stamp set from the Sale-a-Bration brochure.

This card was entered as part of this week's TGIF Challenge #356 - creating from the Sale-a-Bration brochure.

If you haven't "Sale-a-Brated" yet, you still have 6 days left to earn your FREE product(s) from the brochure with every $50 purchase thru my Online Store.

I chose to create a Birthday Otter card because who wouldn't want to celebrate their birthday with this adorable little otter?!


Cardmaking Tips

  • Use 3 1/2" x 4-3/4" pieces of Bermuda Bay Cardstock and also Granny Apple Green cardstock to layer behind the sentiment piece at different angles.
  • Use the Stitched Rectangles dies to cut out a 3" x 4 3/8" piece of Basic White cardstock.
  • Use your grid paper to help you align your sentiments as you stamp onto the Basic White cardstock with Bermuda Bay, Mango Melody, and Granny Apple Green
  • Layer a 2-7/8" x 4-1/4" piece of vellum on the sentiment piece to soften the bold sentiment colors.
  • Use your Light So Saffron (first layer) and Crumb Cake Stampin' Blends to color the little Otter.
  • The Otter's birthday hat was colored using Bermuda Bay and Granny Apple green Stampin Blends.
  • Color a piece of Black & White gingham ribbon with the Dark Bermuda Bay Stampin' blend and adhere as shown.
  • The balloons are from the Hippo & Friends Dies cut from Mango Melody and Bermuda Bay cardstock. Use a white gel pen to add a "glare" on the balloons.
    • The balloon "strings" were made by coloring the Playful Pets black and white bakers twine with the coordinating balloon color using Stampin' Blends.
    • Place a glue dot onto the otter's hand and stick the balloon strings on there as if he's holding the strings.
  • Add some Shimmer and shine to your Otter by placing some Shimmery Crystal Effects. Also add some Wink of Stella onto the otter's hat then finish the card front off with a few Iridescent Rhinestones.


Cardmaking Supplies

  • Click on the following link for a list of supplies used on this project. Please note that the Sale-A-Bration products (See below) and the Irridescent Rhinestones (unavailable) are not included: https://s.tamp.in/qPSjOC 
  • To earn your FREE Sale-a-Bration products, shop at my Online Store.


Thank you SO much for joining me! I do hope you are inspired to create a Birthday Otter card of your own!

Until next time ...