Showing posts with label tgif challenges. Show all posts

Wednesday, October 19, 2022

A peek at "Fitting Florets"

 Happy Wednesday!

I'm so glad I can get back into working on my own card creation after a busy two weeks of preparing for other events.

This week I'm joining in with TGIF Challenges #390 with a Sketch Challenge!


I chose to use a Collection that has not yet been released to the public, called the Fitting Florets Collection. This collection will soon be available for purchase beginning Tuesday, November 1st. These are an early release collection of products from the January 2023 Mini Catalog. 

The card I created is flowery and elegant with the soft combination of colors that are included in the Designer Series Paper (DSP): 


It was hard for me just to focus on one design in the DSP since they're all so beautiful! However, I did use both sides of this DSP. While playing with the sketch, I chose to turn it 90degrees (clockwise) then add a few flowers and leaves to represent the scalloped edge in the sketch. I'm happy with the turnout, how about you?!


Card-making Tips:
  • Cut the background piece of DSP to 4-1/8"x5-3/8". Use the plaid design from the Artistic Mix Decorative Masks to add a subtle touch of Soft Succulent ink to the DSP with a blending brush. Also add some splatters of white ink, randomly on the DSP.
  • Mat the finished piece of DSP onto a Basic White piece of CS that measures 4-3/16" x 5-7/16".
  • The flowery side of the DSP measures 3" x 4" and is mounted with dimensionals towards the top middle of the card front. This is so that the leaf pieces can slide under the left side of the DSP.
  • Stamp the leaf images using Balmy Blue ink onto Basic White cardstock and also Balmy Blue cardstock then cut out with the coordinating dies. 
  • Stamp the other "leaf" images using Blushing Bride ink onto Basic White cardstock and Blushing Bridge cardstock then cut out with coordinating dies.
  • The oval frame was cut from vellum, the flowery DSP, and Basic White cardstock.
    • Use some Soft Succulent ink and a blending brush to add some ink to the oval frame that was cut from Basic White cardstock.
    • The sentiment was stamped onto the vellum with Versamark ink then heat embossed with gold embossing powder.
  • The finishing touch on the card are the embellishments: Gold Adhesive Backed Swirls.


Card-making Supplies:

The supplies listed below does not include the products from the Fitting Florets Collection. Stay tuned for the release of this collection on November 1st.


Thank you SO MUCH for joining me today and I do hope you are looking forward to getting your hands on this elegant collection of products!

Until Next time... 


Tuesday, August 30, 2022

Envelope card using "Tech Support"

 Hello, Hello!!!

I'm jumping on this week to share with you the "Tech Support" stamp set that I've been wanting to play with for some time. I LOVE everything about this stamp set because it's perfect for any "tech-y" person in your life. I have a few of those in my life.

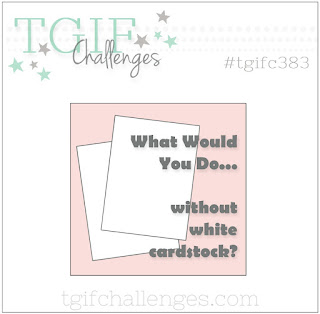
I chose to enter this envelope-card into this week's TGIF Challenge #383. 


This was certainly a challenge to work on! I use white cardstock about 95% of the time! I was up for the challenge so I knew I had to make it happen somehow. My creation focused on what I found to be called the "tech blue" color scheme, which I found on my search on the internet. 


I really liked this color combination so I went with it. I associated the colors in the color palette with the following SU! colors: Night of Navy, Starry Sky, Coastal Cabana, Pacific Point and Gorgeous Grape. The Crumb Cake cardstock was my substitute for the White cardstock- the neutral color.


I love envelope-cards because it's simple to create and it's just a fun card style altogether. 

Cardmaking Tips:

  • The envelope was created using the retired Stampin' UP! Envelope Punch Board for a 4-1/4" x 5-1/2" card size. One end of the envelope was trimmed off. Finished size is 4-3/8" x 5-7/8".
  • Randomly stamp the keyboard image onto the envelope and the 1" x 4-3/8" strip of Coastal Cabana Cardstock using White Craft Ink.
  • The Night of Navy strip of cardstock measures 2-1/2" x 4-3/8".
  • Randomly stamp the "error 404" sentiment onto a 2-1/4" x 4-3/8" piece of Starry Sky cardstock using Starry Sky ink. Adhere onto the Night of Navy piece.
  • The stamped Coastal Cabana cardstock strip is adhered on top of the Starry Sky piece.
  • Cut a long piece (maybe 24"?) of linen thread and tie the ends together to make a circle. Twist the thread so that it makes an infinity shape and fold it in half to make two smaller circles, overlapping one another. Adhere the linen thread with some glue dots.
  • Set a Gorgeous Grape square, cut from the largest die in the Stylish Shapes die set, on top of the linen thread with dimensionals.
  • Stamp the binary numbers onto another stitched square, cut from the 2nd largest die in the Stylish Shapes die set, on Pacific Point cardstock. Using the Amazing Phrasing stamp set, stamp "Woo Hoo" as shown with versamark ink then heat emboss with white embossing powder. Adhere this piece onto the Gorgeous Grape square.
    • PLEASE NOTE: The Amazing Phrasing stamp set is only available until August 31, 2022.
  • Adhere two 4-1/4" pieces of Starry Sky metallic ribbon behind a 9/16" x 3-1/2" strip of Coastal Cabana cardstock that has the "to another year" sentiment embossed onto it.
  • For the inside of the envelope-card, Adhere a 4" x 5-1/4" piece of Coastal Cabana cardstock onto a 4-1/4" x 5-1/2" piece of Starry Sky cardstock. Stamp the keyboard image randomly in white craft ink then the "happy birthday" sentiment. Lastly, Staple some Starry Sky ribbon towards the top.


Cardmaking Supplies

All supplies for this project are listed below except for retired products, basic tools and adhesives.

Thank you so much for joining me this week! Please feel free to comment below on how you feel about this Tech Support stamp set.

Until next time...