Tuesday, August 29, 2023

A slimline card using "Reach for Stars"

Hello crafty friends!

I know.... I've been incognito around here since my last post in June. Summer was definitely a very busy time of the year and I know I'm about to get busy again as soon as we head into the holiday season.

While I have the chance, I want to share my CASE'd version of a slimline card created by Kaitlyn over at Stampin' Through the Catalog Facebook Page. Her card uses products from the Stargazing Suite from page 86-87 of the 2023-2024 Annual Catalog by Stampin' UP! 


Below is Kaitlyn's version of the card.
Her card was just gorgeous and I knew I had to CASE it for a birthday card I wanted to make for my brother.

I didn't stray very far from her creation because I LOVED every single aspect of her design!


Cardmaking Tips:
  • Finished card size: 3-1/2" x 8-1/2" .
  • For this card, it is BEST to arrange your design where you want them before adhering your pieces down. Start with nailing down the location of the twine behind the planets. 
  • Use the following colors for the astronaut image: Lemon Lime Twist, and Azure Afternoon Stampin' Blends ; Crushed Curry Stampin' Write Marker.
  • Use Silver Foil to cut out the stars and the large ring from the coordinating die set. As for the sentiment, make sure it is stamped onto the foil using Stazon Ink then trim around the words and flag the right end.
  • For the inside of the card, left side, create a pocket to be able to insert some cash or a check. The pocket was created from a separate piece of Black cardstock. BTW, The $1mill dollar bill is not real. 
  • You may use The Slimline Envelopes (retired) or create your own slimline envelopes.

Cardmaking Supplies

All supplies used for this slimline card are in the table below, except for tools and adhesives.


THANK YOU SO MUCH for stopping by today! Until next time.... 


Thursday, June 22, 2023

4th of July Flip-Flop Card

 Hello crafty friends! 

This week I have a fun and festive Flip Flop card for you that was inspired by TGIF Challenges #425 - Technique Challenge.

425

I tried and tried and tried to create some die or punch art to create flip flops for this challenge but it just wasn't turning out the way I had hoped.

So, I had to switch gears and create a fun and festive Birthday card for my sweet friend's 4th of July Birthday! 

flip-flop-card_front

flip-flop-card_middle

Cardmaking Tips:

  • The flip-flop mechanism for the card front was CASED from Beth Rush.
  •  For this card, you'll need the following dimensions of cardstock:
    • Poppy Parade (Card-Base): 4-1/4" x 11" ; scored at 5-1/2"
    • Basic White cardstock (mat): 4" x 5-1/4"
    • Azure Afternoon cardstock (mat): 3-7/8" x 5-1/8"
    • Bright and Beautiful DSP mounted onto a piece of Thick Basic White cardstock (both are same size): 3-1/2" x 4-3/4"
    • Holographic specialty DSP mounted onto a piece of Poppy Parade cardstock (front square): 2-7/8" x 2-7/8"
    • Poppy Parade cardstock (front-inside mat): 2-1/4" square
    • Basic White cardstock (front-inside): 2-1/8" square
    • Basic White cardstock (inside): 4" x 5-1/4"

The inside of the card was quite simple, to match the card front


Cardmaking Supplies:

All supplies listed are from the current 2023-2024 Annual Catalog, except for the decorative edge punch used to create the mechanism. 


Thanks so much for joining me today! Until next time...


Thursday, June 8, 2023

Twist & Pop Card for Dad

 Hello crafty friends!

I was inspired to get creating on a fun Pop & Twist card for my husband just in time for Father's Day, using this week's TGIF Challenge #423.

423

My husband always enjoys the fun-fold cards that I make for him and I thought this would be right up his alley. It truly is a fun card to create that looks complicated but once you get the hang of it the first time, it becomes easy.


Dad-card-front


Dad-card-inside

  Cardmaking Tips:
  • The 3 template pieces needed to create the Pop & Twist foundation of the card was CASED from Tami White.
  • I used Thick Basic White Cardstock for the template pieces and have found that it's pretty thick inside and may need to adjust the size of the card-base.
  • The card-front was splattered with Smoky Slate using a watercolor brush and some ink. I also flicked some Dark Smoky Slate ink using the brush tip of the Stampin' Blend. The remaining white cardstock pieces for the inside of the card was simply flicked with the Dard Smoky Slate stampin' blend.
  • The Lemon Lime Twist paper was from the Bright & Beautiful 6"x6" DSP.
  • Use the 2nd & 3rd smallest stitched square dies for creating the different background elements of the card.


Cardmaking Supplies:


Thank you SO much for stopping by!

Until Next Time ...


Wednesday, May 10, 2023

A barrel of monkeys slimline Card

Hello Crafty Friends!!!

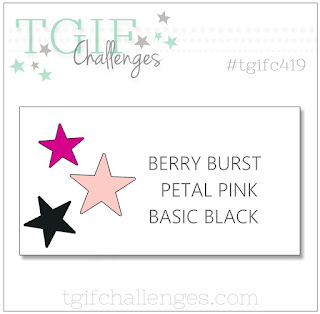
I'm coming back to you to share my crazy monkey creation that was inspired by this week's TGIF Challenge #419.

419
I was super excited to play with Stampin' UP!'s adorable Little Monkey Bundle, located on page 52 of the Annual Catalog. 
little%20monkey%20bundle
I'm in need of more baby cards to have ready to give away and this stamp set is just right for that!

I created a Popular Slimline Card with a barrel full of Berry Burst monkeys. I thought that a card like this for a mom of multiple kids with a new baby would be fun to receive! Don't you think?!

monkey-card-front2

monkey-card-closeup

Cardmaking Tips:

  • Finished size is 8.5" x 3.5".
  • The "barrel" was created by cutting 2 sets of Gray Granite baskets using the Full Basket Dies (retired). One basket was turned upside down and set against the top of the other basket. I made sure to trim the side edges of the solid background layer to smooth it out for a better "barrel" look.
  • Trim off the flesh of the banana to just leave the banana peel. I thought just the banana peels laying around gave the feel of crazy monkeys, LOL!
  • Finish off the inside of the card with a monkey savoring his banana!
monkey-card-inside

(Updated 5/15/23) Watch the video tutorial:

I've created a video tutorial for your viewing pleasure. Please Note that I am aware of the crackling in the audio and I'm working on trying to fix that for my next video. So sorry about that!!!


Cardmaking Supplies:


Thank you so much for joining me today! I sure hope you enjoyed today's project and are inspired to create a barrel full of monkeys of your own.
Until Next time...