
Showing posts with label baby card. Show all posts

Wednesday, May 10, 2023

A barrel of monkeys slimline Card

Hello Crafty Friends!!!

I'm coming back to you to share my crazy monkey creation that was inspired by this week's TGIF Challenge #419.
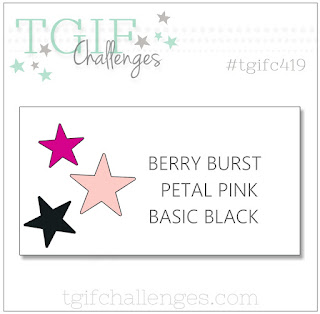
419
I was super excited to play with Stampin' UP!'s adorable Little Monkey Bundle, located on page 52 of the Annual Catalog. 
little%20monkey%20bundle
I'm in need of more baby cards to have ready to give away and this stamp set is just right for that!

I created a Popular Slimline Card with a barrel full of Berry Burst monkeys. I thought that a card like this for a mom of multiple kids with a new baby would be fun to receive! Don't you think?!

monkey-card-front2

monkey-card-closeup

Cardmaking Tips:

  • Finished size is 8.5" x 3.5".
  • The "barrel" was created by cutting 2 sets of Gray Granite baskets using the Full Basket Dies (retired). One basket was turned upside down and set against the top of the other basket. I made sure to trim the side edges of the solid background layer to smooth it out for a better "barrel" look.
  • Trim off the flesh of the banana to just leave the banana peel. I thought just the banana peels laying around gave the feel of crazy monkeys, LOL!
  • Finish off the inside of the card with a monkey savoring his banana!
monkey-card-inside

(Updated 5/15/23) Watch the video tutorial:

I've created a video tutorial for your viewing pleasure. Please Note that I am aware of the crackling in the audio and I'm working on trying to fix that for my next video. So sorry about that!!!


Cardmaking Supplies:


Thank you so much for joining me today! I sure hope you enjoyed today's project and are inspired to create a barrel full of monkeys of your own.
Until Next time...

Thursday, April 7, 2022

Baby Shaker Cards using a Trio of Colors

 Hello, Hello Crafty friends!

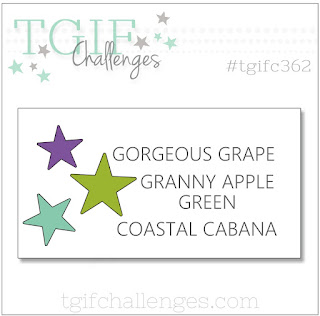
I've got a couple of shaker cards to share with you this week that were inspired by this week's TGIF Challenges #362.


This beautiful trio of colors gave me the opportunity to create a baby boy card and a baby girl shaker card. I really did need them and had to snatch the opportunity to make some, PLUS I had to use the *All For Baby Bundle before it retires at the end of April.

*Please Note: unfortunately, the Stamp Set is no longer available but you can still order the coordinating dies, if you don't have them.

The original version of the card came out like this one below.


While I think it's still cute, I kicked it up a notch and ended up making a few changes:

  • Using the same color of cardstock for the base of the card
  • Adding score lines at the top and bottom of the card front
  • moved the sentiment towards the bottom of the card

Once I made the above changes, I feel like this is a better version of the card. Don't you agree?


Below is the baby-girl version of the card. I'm LOVING this Gorgeous Grape color!


Card-making Supplies:


Gather the supplies that I list in the following link along with a few measurements below and follow along with me in my video tutorial further down! https://s.tamp.in/oP7tI7

  • Card Base: 4-1/4" x 11" cardstock, scored at 5-1/2" along the length
  • Card front: 4" x 5-1/4" cardstock ; use a 2-3/4" circle die to cut the center.
  • background piece: 4-1/2" x 3-1/4" shimmery white cardstock
  • Window piece: 3-1/4" x 3-1/4" window sheet

Video Tutorial:

I have to mention that I failed to add the little bows of linen thread on each end of the "clothesline" in my video. Oops!!! Make sure you don't skip that part!


Retiring Products

Don't forget to stock up on your favorite products before they’re gone for good! Lots of items are already gone! Save up to 50% on essential craft supplies. Again, this selection of Last Chance Products are only available while supplies last.

Head over to my blog post to know the details. 


Thank you so much for taking a look at today's cut combo of projects!!!

Until next time...

Sunday, January 19, 2014

Oh baby baby

I finally got some "me time" in this weekend and had to put together a baby card for our adopted son's birthmother. She had another baby last week and she and her husband decided to parent this child. We are super happy and excited for them as they begin a new chapter in their lives! 

Isn't he so sweet?!
A happy and healthy baby Boy: Caleb born on January 8, 2014; 7lb 9oz; 20" long

To get my creative juices flowing, I recently pinned a cute card sketch that I've been wanting to use on Pinterest so I took advantage of it!


I pretty much stuck to the whole layout of the card sketch because I like the layers. 


Here's a slightly stepped up version...I simply added a border with the fine tip of my crumb cake marker and a ruler. 


 My tips:
  • I used MDS (my digital studio) to print the "oh baby baby" sentiment on a 2.5" circle from the Hello World digital kit. I colored the words with crumb cake and pumpkin pie.
  • use a small safety pin to attach onto the circle next to the sentiment to give it some dimension.
  • I cut the baja breeze and island indigo rectangles to 3"x 1.75" then rounded the opposite corners with the corner rounder punch.

Supplies Used:
  • cardstock: crumb cake, island indigo, *baja breeze, pumpkin pie, whisper white
  • ink: crumb cake, versamark (for the bottle)
  • stamps: *baby bundle, "oh baby baby" digital stamp
  • punches: 2 1/2" circle, corner rounder
  • embellishments: *trinkets
  • ribbon: *baja breeze seam binding
  • paper piercing tool and circle template
  • polka dot embossing folder
NOTE: * indicates items are retired


I am looking forward to one day meeting this sweet little boy and I'm sure that our son would be happy to meet his little brother as well! 

Thank you for stopping by and don't be shy to comment about my latest creation! Until next time...