Showing posts with label color challenge. Show all posts

Tuesday, April 9, 2024

Celebrating with "Planted Paradise"

 Hello Crafty Friends! 

I've got a slimline card to share with you this week using the Planted Paradise stamp set from the 2024 Mini Catalog by Stampin' UP!. This card was made especially for a friend and neighbor's Birthday that has an affinity for gardening and all things plants.

My inspiration for the card came from this week's TGIF Challenge #467.


I'm a fan of this color combination because it's bright, cheery, and fun! It pairs very well with my friend.

Cardmaking Tips:
  • Finished size: 8-1/2" x 3-1/2"
  • Since the DSP is only available in 6"x6" size, you'll need to bring together 2 pieces of DSP with a little tape: 3-1/4" x 6" and 3-1/4" x 2-1/2"
  • matt the DSP with 3-5/16" x 8-1/2 piece of white cardstock for a finished look on the DSP edges.
  • cut 3 deckled circles from white cardstock and emboss 2 of them with the Distressed Tile embossing folder. The other will remain plain since you'll need to stamp directly onto the paper.
  • The pots and plants on top and bottom of the card are stamped and fussy cut. 
  • For the center circle, the plants are stamped directly onto the white deckled circle. I did use some masking paper to help me layer the different plant images. The pot is fussy cut and popped up with dimensionals. 
  • Use the fine tip of your Blueberry Bushel Stampin' Write Marker to color the thorax of the Berry Burst butterflies. Create 3 of these (2 for the card front and 1 for the inside card).
  • Carryover some of the same images from the card front to the inside of your card along with your birthday sentiment (from the Beach Day stamp set).


Cardmaking Supplies:


------------------------------------------------------

Thank you for stopping by! 
Feel free to let me know your thoughts or favorite thing about the Planted Paradise stamp set in the comments below.

Until next time....


Thursday, December 7, 2023

Christmas Money Envelopes

 Hello Crafty Friends!

It's been a while since I've joined in on the TGIF Challenges and am excited to share my creation with you for their color challenge.

I took advantage of the color challenge to create a few money/check envelopes for Christmas using the Beary Cute Bundle from the 2023 Sept.-Dec. catalog by Stampin' UP!.

I'm sad you can't feel my polar bear though... he feels velvety soft since I chose to you use the white velvet paper (retired) for him.


Envelope Making Tips:

  • Finished size: 6-3/4" x 3"
  • Cardstock/Paper Dimensions:
    • Real Red Cardstock base: 6-3/4" x 7"; scored at the long side at 2" & 5".
    • 2 pieces of Joy of Christmas DSP (sold out): 1-3/4" x 6-1/2"
    • Belly Band: (1) 1" x 7-1/2" strip of white Textured Shimmer paper
  • Be sure to use StazOn ink to stamp on the white velvet paper (retired) in order to avoid smearing the image.


If you didn't know already, which I hadn't paid attention until recently, lots of items I used here are not orderable or sold out. The Joy of Christmas DSP has sold out and is no longer available for purchase. Thankfully, you can easily swap out a different DSP to show off the Real Red color in the paper. I would recommend the Traditions of St. Nick DSP or the One Horse Open Sleigh DSP as some alternatives.


Envelope Making Products:
There are a few items on this list that I need to inform you on the status of:
  • Nested Essentials dies - available week of Dec. 25th
  • Snowflake embossing folder - available week of Dec. 18th
  • Bone folder - available week of Dec. 18th 
  • Beary Cute Bundle & punch - Sold Out
  • Joy of Christmas DSP - Sold Out


Thank you for stopping by! I would love to know your thoughts on those "Beary Cute" envelopes in the comments section below this post.

Until next time...

Thursday, August 11, 2022

Fall pumpkin card

 Hello Crafty Friends!

This week I present to you a fall-style card that I created, inspired by this week's TGIF Challenges #380.


The fall season is my FAVORITE season of all, especially after enduring a very hot and dry summer, here in North Texas. 

I wanted to the focus of the card to be the pumpkin and I believe I was able to achieve the look I was going for. What do you think?


The only downfall to this card is that it wouldn't do very well in an envelope because of the curled-up cardstock. I was tempted to squish it but I couldn't bring myself to do it so I just left it alone. You could also consider creating this as a frame piece instead of a card. 

I'm running low on time to provide you with cardmaking tips but I can at least provide you with dimensions.

Cardmaking Tips

  • Use the largest deckled die for the frame
  • Use the retired 2nd smallest stitched oval from the Stitched Shapes dies. 
  • the top of the pumpkin was created by adhering two short pieces of Early Espresso faux suede trim, side by side.
  • the curly strips of paper were created by cutting an 1/8" strip of Crumb Cake cardstock and wrapping the strip around a skinny paint brush. Adhere some of the spots of the paper with tombow glue to keep them in place. 
  • use the Bermuda Bay Stampin' Blends to color onto a piece of Snowflake Specialty Vellum and also for the extra lines in the Gingham Cottage DSP.


Cardmaking Supplies


I do hope you enjoyed today's card. Please don't hesitate to let me know your thoughts in the comments below!

Until Next time ... 


Thursday, April 7, 2022

Baby Shaker Cards using a Trio of Colors

 Hello, Hello Crafty friends!

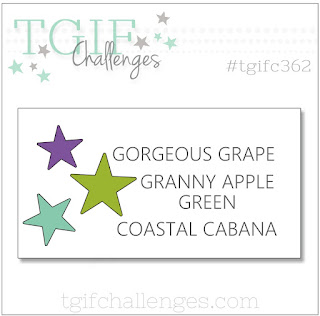
I've got a couple of shaker cards to share with you this week that were inspired by this week's TGIF Challenges #362.


This beautiful trio of colors gave me the opportunity to create a baby boy card and a baby girl shaker card. I really did need them and had to snatch the opportunity to make some, PLUS I had to use the *All For Baby Bundle before it retires at the end of April.

*Please Note: unfortunately, the Stamp Set is no longer available but you can still order the coordinating dies, if you don't have them.

The original version of the card came out like this one below.


While I think it's still cute, I kicked it up a notch and ended up making a few changes:

  • Using the same color of cardstock for the base of the card
  • Adding score lines at the top and bottom of the card front
  • moved the sentiment towards the bottom of the card

Once I made the above changes, I feel like this is a better version of the card. Don't you agree?


Below is the baby-girl version of the card. I'm LOVING this Gorgeous Grape color!


Card-making Supplies:


Gather the supplies that I list in the following link along with a few measurements below and follow along with me in my video tutorial further down! https://s.tamp.in/oP7tI7

  • Card Base: 4-1/4" x 11" cardstock, scored at 5-1/2" along the length
  • Card front: 4" x 5-1/4" cardstock ; use a 2-3/4" circle die to cut the center.
  • background piece: 4-1/2" x 3-1/4" shimmery white cardstock
  • Window piece: 3-1/4" x 3-1/4" window sheet

Video Tutorial:

I have to mention that I failed to add the little bows of linen thread on each end of the "clothesline" in my video. Oops!!! Make sure you don't skip that part!


Retiring Products

Don't forget to stock up on your favorite products before they’re gone for good! Lots of items are already gone! Save up to 50% on essential craft supplies. Again, this selection of Last Chance Products are only available while supplies last.

Head over to my blog post to know the details. 


Thank you so much for taking a look at today's cut combo of projects!!!

Until next time...

Friday, March 11, 2022

Spring Bunny-punch-art Frame

 Hello Crafty Friends!

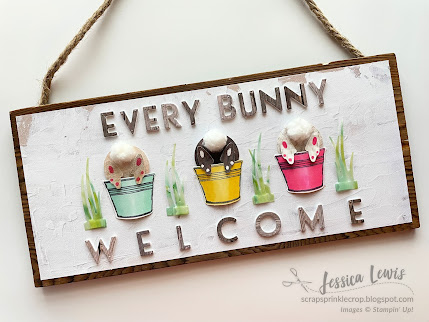
I have a different project for you today. Instead of a card design, I put together a cute little spring frame featuring some bunny-punch-art and spring colors! I sure hope you love it as much as I do!


This came together as part of a Stampin' UP! Challenge - #ConceptArtCreativeChallenge that uses 5 different Stampin' UP! colors: Daffodil Delight, Polished Pink, Pool Party, Shaded Spruce and Granny Apple Green.


One thing I failed to mention in my video tutorial is that I had a layout in mind already and it came from the CUTEST little frame that I saw at Kohl's. 

I knew I wanted to recreate this frame using some Stampin' UP! supplies that I already had on hand so I wouldn't have to spend $30+ on the one at Kohl's (tee-hee). 

This color challenge gave me the more reason to create a spring-inspired frame so I ventured to my craft desk!

I have put together a Supplies & Dimensions List for you located in the Free Tutorials tab of this blog page. So, gather your supplies and create this frame along with me in the video tutorial below. This would look cute on your front door.


Thank you SO MUCH for creating with me and I wish you a blessed weekend!

Until next time ...