Tuesday, April 27, 2021

#TGIFC313 - April Paper Pumpkin meets Pampered Pets

 Hello Crafty Friends! 

This week I'm coming to you with a card that features the adorable Pampered Pets stamp set and the April Paper Pumpkin kit as part of my entry to the TGIF Challenge #313, which is all about dogs & cats. 


I personally prefer dogs over cats so I naturally went for the dog image, especially since our adorable pup, Blue, is a mini schnauzer. He's a cutie, isn't he?!


The card came together rather quickly because the elements contained in the Paper Pumpkin Kit were already complete and ready to be placed on the card! That's one of my favorite parts of the kits!


 Below is my version of the card.


CARDMAKING TIPS

  • The following elements are from the Paper Pumpkin kit: rainbow, sun, silver glitter paper, birthday banner, sentiment, and twine.
  • The best part of this kit is that it coordinates with the Ice Cream Corner DSP, which was used for the card mat and the large stitched square.
  • I reversed the dog image to have him face to the left by using the Stamparatus and the Silicone Craft Sheet
    • After placing the stamp onto the Stamparatus, stamp the image onto the silicone craft sheet using Memento Ink. 
    • Carefully place the piece of Cinnamon Cider cardstock on top of the wet image and firmly rub the cardstock without letting it move around. 
    • Leaving the piece of cardstock in its place, stamp the image once again onto the cardstock. This is for the purpose of being able to line up your die for cutting out the image, since you cannot reverse the die. 
  • Use a white gel pen (non-SU!) to color the collar of the dog. Use some light cinnamon cider stampin' blend marker to shade a few areas of the dog as shown.
  • The two little butterflies by the dog were colored with Rich Razzleberry and Pool Party Stampin' Blends.
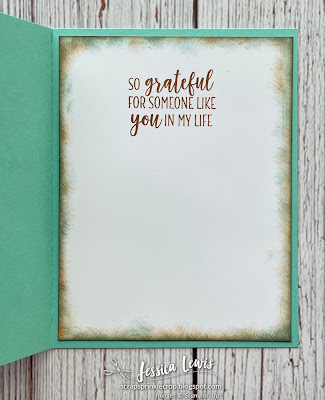
  • I carried over some of the same elements from the card front into the inside of the card.


SUPPLY LIST

Click on the following link for the list of supplies used for this project, minus the white gel pen, Stitched Shapes Dies and Paper Pumpkin kit: https://s.tamp.in/OKytDh


PAPER PUMPKIN

If you haven't heard of Paper Pumpkin by Stampin' UP!, it is a crafting subscription kit that delivers creativity to your door every month. Each box includes everything you need to make a stunning project. They’ll surprise you with projects like cards, gift packaging, home décor, and more for just $22.00 a month (shipping included). 

Subscribe by the 10th of any month to receive that month's kit at mypaperpumpkin.com 


This is all I have for you today and would love to hear your thoughts on this week's card challenge! Share them with me on the comments below!

Until next time... 


Friday, April 23, 2021

2021-2023 Stampin' UP! In-Color Club

 REGISTRATION IS NOW OPEN FOR IN-COLOR CLUB!!!

Build your NEW Collection of 2021-2023 In-Colors from the 2021-2022 Stampin’ UP! Annual Catalog by joining my In-Color Club, beginning in May!

 Each month, you will receive all the products for one of the colors where each month features a different color (Polished Pink, Pale Papaya, Evening Evergreen, Soft Succulent and Fresh Freesia).


Each month, your In-Color Club Kit will include the following: 

1.    1 pack of cardstock (24 sheets)

2.    1 spool of 3/8” Open Weave Ribbon

3.    1 ink pad

4.    1 ink refill

5.    1 Stampin' Write Marker

6.    20 In-Color Jewels, in 2 sizes

7.    2 Stampin' Blends (Light & Dark)

8.    Eight 6”X6” sheets of Designer Series Paper

9.    A handmade card featuring your In-Color of the month. 

10.  A special and surprise gift from me! 


Cost is $55 plus $8 priority shipping once a month , beginning in May and ending in September. 

If you are local, skip the shipping and do a porch pick up.

  I will invoice you each month through PayPal on the first of every month. 

Deadline to sign up is May 3, 2021.

 Sign up by clicking on the following link:

 In-Color Club Registration


Thursday, April 22, 2021

#TGIFC312 - A Vintage Hello Card

 Hello crafty friends! 

I am returning to my craft space in time for this week's TGIF Technique Challenge #312 - Very Vintage.


I really struggle with vintage cards and they are not my forte so this challenge was definitely a challenge for me! As I searched for vintage inspiration, I came upon this picture that became my choice to create a card similar to the colors shown in here. I love that pop of blue in the cabinet in the background so I built my inspiration from that.


Below is my version of a Vintage Card. As you may see, I used the blue and brown from the cabinet, the purple hues from the vase of flowers, the dark blue brick background and the black and white in the table cover. 


 Tips to create the card

  • I tried to re-create the cabinet using my Drybrush Background stamp and Coastal Cabana ink then sponged some Cinnamon Cider ink in the white areas and edges and ran it thru the Pinewood planks embossing folder.
  • The cabinet dimensions are 2 3/4" x 4 3/4". The two larger panels on the bottom measure 2 1/2" x 1". The two smaller panels on the top measure 1 1/2" x 1". 
  • the top two panels have a piece of Acetate from the Fine Art Floral DSP that measures 3/4" x 1 1/4".
  • If you look closely at the panels, I used my scoring board to score around each panel, 1/8" in from from all four sides. 
  • The Country Home stamp set is one of my favorite stamp sets and have to use it a bit more before it retires in May.
  • Use the following Stampin' Blends to color the flower arrangement: Highland Heather, Rich Razzleberry, Mossy Meadow, Bronze (for the bottoms of the cotton flowers). I used the color lifter on the Bronze so it wouldn't be so bold. 
  • Use the True Love DSP and the 2nd largest stitched shape oval for the "tabletop" then adhere a piece of vellum on top, to mute the colors a bit.
  • The inside of the card was sponged around the edges with Coastal Cabana ink and Cinnamon Cider ink.

Supply List

For a full list of supplies used, minus the Stitched Shape Dies (not orderable) click on the following link: 

Let me know what you think about this week's card challenge. Do you enjoy vintage techniques? Comment below!

Until next time... 

Tuesday, April 13, 2021

A peek at the new "Etched in Nature" stamp set

 Hello Crafty Friends! 

Welcome to this week's blog post featuring the new Etched in Nature stamp set from the upcoming 2021-2022 Annual Catalog by Stampin' UP! (released on May 4th - I cannot show you the stamp images just yet until the catalog goes live). 

I admit I had a bit of a difficult time coming up with a good card with this stamp set because I'm not normally attracted to a lot of nature and abstract stamp sets like this. But Stampin' UP! sent it to me and provided me with the challenge so I took on the challenge to try to make something with it. 

CARD 1 - Cherish Happy Moments

Below is what I came up with for my first card.

I used my handy-dandy color chart to come up with a color combination of Coastal Cabana, Crumb Cake, Petal Pink and Very Vanilla.

I do enjoy the warm color combination for this card.

TIPS FOR THIS CARD

  • Use versamark ink to stamp the background
  • Cut one strip of the petal pink pattern from the In Good Taste DSP (designer series paper) to 3/4" x 4 3/4" and flag one end.
  • Cut one strip of Crumb Cake cardstock to 1/4" x 4" and flag one end then layer on top of DSP strip.
  • The Very Vanilla cardstock piece measures 2" x 3". I colored directly onto the stamp using Coastal Cabana and Petal Pink Stampin' Write Markers then stamped onto the cardstock for the background.
  • The butterfly image was stamped on Very Vanilla cardstock using Crumb Cake ink then colored with Petal Pink and Mint Macaron stampin' Blends. I added some Shimmery Crystal Effects for some shine.
  • Finish off the top of the Very vanilla piece with a strip of Scalloped Lace Trim and A Linen Thread bow.


SUPPLY LIST
Click on the following link to view a full list of products used for this card, minus the Etched in Nature stamp set, since I cannot show this image just yet. https://s.tamp.in/HURK-8


CARD 2 - Just For You
This second card is my favorite out of the two samples. I love the white background with that pop of color in the middle showing through the oval window.


TIPS FOR THIS CARD
  • Use the Evergreen Forest embossing folder for the 4 3/16" x 5 7/16" piece of Basic White cardstock.
  • Use your blending brushes along with Flirty Flamingo, Pear Pizzaz and So Saffron ink pads to create the background. After you're satisfied with how it looks, cut out the large oval using the Stitched Shape Dies. Emboss this piece with the Evergreen Forest embossing folder such that you place the cardstock to align with the Basic white piece that was embossed.
  • Create a frame from Basic white cardstock using the largest stitched oval die.
  • Use the Forever Fern dies to cut out the leaves from Mossy Meadow cardstock and arrange to adhere towards the bottom right side of the frame.
  • After stamping the bird image onto Basic White cardstock with Memento Ink, color the bird using the Crumb Cake, Blackberry Bliss, Mango Melody and So Saffron Stampin' Blend markers. I love that purple shading on the breast of the bird!
  • Stamp the sentiment onto a scrap piece of the background that was created with the blending brushes using Memento Ink and trim close around the sentiment. 
  • Finish off the card front with some linen thread behind the sentiment.


SUPPLY LIST

Click on the following link to view a full list of products used for this card, minus the Etched in Nature stamp set, since I cannot show this image just yet. https://s.tamp.in/Sku578


NEW 2021-2022 ANNUAL CATALOG
If  you are wanting your very own copy of the new catalog, contact your local demonstrator. If you don't have one, don't hesitate to reach out to me for a copy. I'll be happy to mail one out to you.


This is all I have for you today! I do hope you enjoyed these two projects and would love to hear your thoughts on which card you liked best in the comments section below! 

Until next time ... 


Thursday, April 1, 2021

#TGIFC309 - DSP with the 'In Bloom' stamp set & Gilded Leafing

 Hello Crafty Friends!

I'm returning for another fun blog post inspired by this week's TGIF Challenges #309 -  a designer take-over. Tanya Rees has challenged us to stamp your own DSP (designer series paper). 

I've been itching to use my In Bloom Bundle and so this was a good opportunity to do it!

I decided to create a flowery DSP and add a little shine and pizzaz with my Gilded Leafing. This was done on an 8.5" x 11" piece of Basic White Cardstock.


You can watch my video below on how I did this.


As for the final product using my DSP, I put together a 3" x  3" card with a matching Curvy Keepsake box. I'm LOVING the spring colors, especially the purple hues of Purple Posy and Highland Heather!


TIPS on making the Card:


>> Finished dimension: 3" x 3".
>> The "DSP" was cut to 2 3/4" x 2 3/4" and matted with a 3" x 6" piece of Purple Posy cardstock.
>> I lengthened the stitched frame by using the technique where you partially cut the Purple Posy cardstock with the die twice. See instructions below. ** The important thing to note is that the top cutting plate needs to be fed into the Stampin' Cut machine first. Otherwise, you will have problems with the die moving or not advancing at all if you feed it with the die edge first.
>> Use the Springtime Joy stamp set for the sentiment and the little butterfly.
>> The little butterfly was colored with the Seaside Spray (for wings), Highland Heather (for dots on wings), Old Olive (for body) Stampin' Blends.
>> cut two stitched flowers and curl the petals of one of the flowers then layer with a dimensional for some extra dimension.
>> the inside of the card was kept simple. I cut out one of the flowers that I stamped to create the DSP and adhered it to a 2 7/8" x 2 7/8" piece of basic white cardstock.


TIPS on making the Box:


>> I used the regular-sized Curvy Keepsake box dies, but if you hurry, you can purchase the Mini Curvy keepsake dies since they're retiring.
>> The tag was created very similar to the mini card. Only difference is that I stamped "welcome spring" from the Springtime Joy stamp set and punched it out with the Classic Label punch, which is also retiring (arghh...). I cut the label between the two words then adhered as shown. 
>> finish off the box by tying the tag with some white twine and a piece of 1/2" white faux linen ribbon.


Product List
Click on the following link to view the full list of products used for this project, except for the Purple Posy cardstock which is not orderable: https://s.tamp.in/-l0TlI 


Retiring Products


If you would like to see what products are retiring from the 2020-2021 Annual Catalog, check out my blog post here or head over to my Online Store.


This is all I have for you this week! I do hope you're inspired to create your own DSP with whatever stamp set you own! I'd love to hear from you so leave me a note in the comments below.

Until Next Time...