Tuesday, February 21, 2023

"Hello, Irresistable" Cards

 Hello Crafty Friends! 

I'm happy to report that I was able to work on a few cards this past weekend to give you a sneak-peek of a NEW collection coming March 1st, called the Hello, Irresistible Suite Collection. I can't share the actual product images with you just yet!

Please note that this collection is NOT in any of the current Stampin' UP! catalogs but IS part of their new product release strategy: Online Exclusives.

As I put together a couple of card samples, I chose to merge the products in this suite with this week's TGIF Challenge #408 - Sale-a-Bration Challenge (SAB).

The SAB product I chose to feature is the Dandy Designs DSP (designer series paper), which you can earn for FREE with $100+ purchase of current Stampin' UP! products during Sale-A-Bration. This promotion ends February 28th.  

This 48-sheet pack of 12" x 12" paper is the one for you! It includes versatile patterns such as plaids, polka dots, and stripes. Make this paper the background for a card or scrapbook page. Or cut it into strips or accent pieces, which is what I did for the "Friend card" below.


HELLO CARD

For this card, I focused on the pink and purple tones in the Dandy Designs DSP  but also wanted to feature the different designs as in the Friend Card below by cutting strips of the DSP.

Card-Making Tips:

  • cut 6 - 1/2" strips of DSP. Using your Grid Paper, align the strips together then use Post-It Tape to temporarily hold them together while you cut out the largest stitched circle using the Stylish Shapes dies. Adhere these strips to a separate stitched circle cut from Basic White cardstock.
  • Add some Adhesive Sheets to a piece of Fresh Freesia cardstock and use the circle die from the Irresistible Blooms Dies to cut the circle. Snip off the sections that are attached in order to release the circle only from the rest of the cardstock. Adhere on top of the stitched circle piece.
  • Stamp the two flower images from the Irresistible blooms stamp set onto a piece of Shimmery White cardstock using Petal Pink ink. Then spritz some water on the images in order to spread some of the ink. Cut out with coordinating dies when dry then adhere large flower flat onto card-front. The smaller flower was adhered to center of large flower with dimensionals.

Card-making Supplies:

The supplies listed below are products used for this card, except for the Hello, Irresistable collection of products which will be available March 1st.


FRIEND CARD

This card is simple and fun for any occasion that you want to give to a friend. I focused on the green and blue colors in the Dandy Designs DSP.

Card-making Tips:

  • Finished card size is 4-1/4" x 4-1/4".
  • Adhere 4 different 3/4" width strips of paper with varying lengths onto the card-front. In this case (from top to bottom): 3-1/4", 3-7/8", 3-3/4" and 4".
  • The sentiment piece is cut to 3/4" x 3-1/8" from Basic White cardstock. Stamp the sentiment towards the left side using Fresh Freesia Ink. Then punch the right side using the Happy Labels Punch. Adhere the sentiment with dimensionals.
  • Add a few of the Fresh Freesia embellishments (2021-2023 In-Color Jewels - retired) for the finishing touch.

Card-making Supplies:

The supplies listed below are products used for this card, except for the Hello, Irresistable collection of products which will be available March 1st. 


2 MORE CARDS...
I have 2 more cards to share with you using the same Hello, Irresistible Suite Collection and need to mention my little mis-hap...
 
This card below was my first and original card that I thought used the Dandy Designs Paper because it was in my Dandy Design Paper Holder. After being half-way into creating the card, I noticed that this was actually the Flowers & More DSP from the 2023 Mini catalog! LOL... I figured I should keep going and finish the card anyway because this paper is cute too!


"HAPPY-HOORAY" SLIMLINE CARD
This slimline card was inspired by the TGIF sketch challenge #407 from last week and didn't get to finish it on time to submit it but I enjoyed creating this one.
 
 
I plan on giving this to some sweet friends of ours that will be getting married soon in March. Notice that this card features some MORE new products that are also a part of the new product release strategy: Online Exclusives.   
 
I also love the fact that the Designer Paper here matches perfectly with the Soft Succulent Slimline envelopes
 
 
This is all I have for you this week! Be sure to check back next week on March 1st for the public release of those Online Exclusive Products.
 
Until next time...

Wednesday, February 15, 2023

Another Birthday with Taco Fiesta

 Hello, Hello!

I am overdue for another blog post and although I've been creating many other things, I find myself sharing another fun and festive birthday card for my dear husband using the Taco Fiesta Stamp Set. Because, why not?!

This time around, I went with a fun fold card that is not as complicated as it may seem. However, it was a little tedious to decorate because of how you need to lay things out in order to be able to open and close the card.


The Triple Cube Pop-Up Card template is CASED from Meg Loven at lovenstamps.com. She provided instructions plus a video on how to put this together. 

Card-making Tips:

  • use the Layered Stripes background stamp to heat emboss onto a piece of Sahara Sand cardstock using white embossing powder. Cut this into (6) 1-5/8" x 1-5/8" squares and adhere to the assembled boxes using tape adhesive.
  • Use the Conversation Bubbles Bundle to add some words to your fun characters as shown.
  • The "happy birthday" sentiment is from the Biggest Wishes stamp set and was heat embossed in white onto Coastal Cabana Cardstock and Pool Party cardstock.


Card-Making Supplies:

Below is a list supplies used for this project aside from adhesives.


Thanks so much for stopping by today and as always, you are welcome to comment below and let me know your thoughts on this Triple Cube Pop-Up Card.


Thursday, January 26, 2023

Birthday Card using Taco Fiesta

 Hello Crafty Friends! 

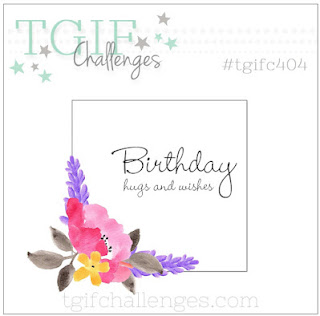
I'm quickly jumping on to share a recent card I created just in time for this week's TGIF Challenges #404 - birthday cards.


My take on the birthday card didn't have anything to do with the sketch shown besides the birthday part of it and that's because...

The Taco Fiesta stamp set is one of my favorite sets in the 2023 Mini Catalog by Stampin' UP! so I HAD TO use it for my brother's birthday card!

I love creating shaker cards and birthday cards are always the perfect excuse for making them! In combination with the Stampin' Blends, the Taco Fiesta stamp set and the Dandy Designs DSP (FREE thru Feb. 28th), this is such a fun card!

Don't forget to finish off the inside and stamp on the envelope before you put all your supplies away! For the inside of this card, I trimmed off the top flap of a 3"x3" envelope so I can include a little cash inside as my brother's birthday gift.

The "happy birthday brother" is from the Best Family Ever stamp set. Love everything about this greetings stamp set since it's so versatile!


Cardmaking Supplies:


Thanks so much for stopping by to take a look at this week's creation! Don't hesitate to comment below on your thoughts about the Taco Fiesta stamp set. 

Until next time ...


Thursday, January 5, 2023

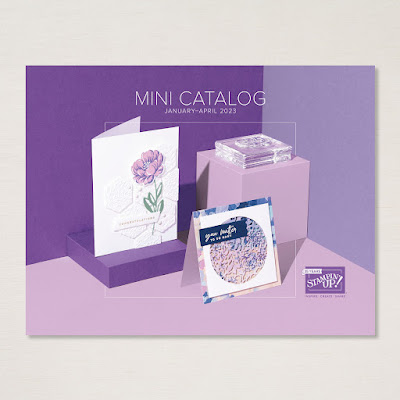
The January-April 2023 Mini Catalog is here!

 Hello Crafty Friends & Happy New Year! 

After taking a long break from social media and blogging, I'm back into gear just in time for the moment many have been waiting for....

Introducing the NEW and Wonderful January-April 2023 Mini Catalog!


With the turn of every page, you’ll find stunning product suites, inspiring project ideas, and the kind of coordination you can’t find anywhere else!

Along with this awesome catalog comes the biggest promotions of the year: Sale-a-bration (SAB)! 


The SAB brochure contains great products you can earn for FREE when you shop, host, or join the Stampin' UP! team between January 5th to February 28th, 2023.

Sale-A-Bration is an excellent time to join Stampin’ Up! as part of my team. In addition to the already excellent value of the Starter Kit, if you decide to sign up as a Stampin’ Up! demonstrator during Sale-A-Bration, you can choose from three incredible options:
  • Option 1: The exclusive Boho Blue Mini Machine ($63 value) + your choice of $175* of Stampin’ Up! products for only $129.
  • Option 2: The original white Mini Machine ($63 value) + your choice of $175* of Stampin’ Up! products for only $129.
  • Option 3: Your choice of $175* of Stampin’ Up! products for only $99.
*That’s $50 more product than the standard Starter Kit offer!


Product Videos
Watch these videos to get to know the Mini Catalog & Sale-a-bration Brochure:

DSP Color Coordination Resource
I normally like to share my go-to cheat sheet for all the DSP that is featured on each catalog. This is perfect for a quick glance at what coordinating colors are featured on each set of DSP. I Love using this when I design a project and am thinking of what colors to use.

I highly recommend that you print this out in high quality so that you may view the colors as they should be. I always have mine handy on my clipboard in front of my stamping area for quick and easy reference.
Country Bouquet Bundle 
This discounted bundle is a set of products within the Country Floral Lane Suite of products as shown on page 8-9 of the Mini Catalog. 


I joined in on this week's TGIF Challenges #401 and decided to create a few quick and simple set of cards to showcase what you can do with this bundle! 


As part of the effort in saving time and creating something simple, use the Kraft Note Cards & Envelopes, which are precut and scored for you! With 20 cards and envelopes included in this set, you can make lots of cards in no time!


Card-making Tips:
  • Use the Country Gingham DSP to cut out a 2-3/4" circle, using the Layering Circles Dies. Then use the Country Bouquet Punch to partially punch out the large heart from the DSP.
  • Stamp the heart outline image from the Country Bouquet Stamp Set onto Basic White cardstock using the coordinating ink color. Punch out the full heart using the Country Bouquet Punch
  • Adhere the gingham DSP onto the card front using dimensionals then adhere the full heart directly onto the card front and aligned with the partial heart on the DSP piece with Stamp n Seal adhesive.
  • Randomly stamp the small hearts images in the coordinating ink color. 
  • You can do some simple stamping on the inside of the card as shown below.


Card-making Supplies:


Thank you SO MUCH for joining me today! I do hope you will enjoy the Mini Catalog and Sale-a-bration brochure as much as I do! 

If you are wanting your very own copy of the catalog & brochure, please contact your local Stampin' UP! Demonstrator by clicking on the "Find a Demonstrator" link at the top the Stampin' UP! website. If you don't have one, I would love to get those catalogs to you, so please contact me

Have a wonderful start to the new year 2023!!! Until next time ... 


Thursday, December 1, 2022

Shop Stampin' UP! with a Gift Certificate

Happy December Crafty friends!!!

We are officially in the Christmas season and as you begin to think about your crafty friend or family member, don't forget about getting them an E-Gift Certificate so they can buy their own Stampin' UP! products. 

The Details:

  • E-Gift certificates are available in $25, $50, $75, $100, or $150 and for immediate download! 
  • This E-gift certificate cannot be used for online orders. Product Orders can only be placed through me, via email
  • Email orders will receive a confirmation from me (Scrap Sprinkle Crop).
  • E-Gift certificates purchased through Scrap Sprinkle Crop are only redeemable through Scrap Sprinkle Crop. Funds received are being held and waiting for redemption.
  • E-Gift certificates will expire on 12/31/23 and will be verified.
  • E-Gift certificates must be used in their entirety. No partial orders can be accepted.
  • This offer is only valid for this month of December 2022.

Begin Shopping:

* Please be sure to indicate the First and Last Name of the person you are gifting the E-Gift certificate to by noting that in the "Special Instructions" section at the bottom of the customer/check-out page.

Click on the following link to begin shopping! SHOP NOW


Tuesday, November 22, 2022

Onstage Local Update

 Hello crafty friends!

I had a wonderful weekend (on 11/12/22) of stamping with some sweet and talented ladies while at Onstage Local in Arlington, TX , hosted by Stampin' UP!

There's so much to share so I'll get started with a few pictures that we took together at our table.


I'll have to explain the middle picture on the left... we had a emoji-matching activity together where we needed to match our face with the emoji they showed on the screen. Hence, our funny looking faces! LOL...

As part of our fun Onstage experience, there's lots of swapping happening throughout the event and am sharing with you what I received from other demonstrators. If that demonstrator shared their website, I have linked to it in their name.


Aletha Pershall


By Ann Cardile


By Caren Curtis


By Caron Bailey


By Cathy Bartlett - Oklahoma


By Debbie Russell 


By Dena Grant


By Denise Sullivan - my sweet and talented Upline


By Diane Taylor


By Erica Cerwin - used her very own $1mill stamp set. I want to be like her when I grow up!


By Ethel Wegner


By Jen Kimber 


By Kathy Morgan


By Kimberly Jones


By Pam Funk


By Sandra Ballas


By Sue Berreth


By Sue Sanders


By Susan Stitt


By Tracey Gouraud


By Tracy Walker - Oklahoma


Unknown Demonstrator


Unknown Demonstrator


Unknown Demonstrator


Unknown Demonstrator


By Jara Meshell


By Allison Hicks


My Swaps
As for me, I chose to create 2 different swap cards, where both are Christmas/Holiday themed. You may not believe this, but I hadn't played with the stamp sets that I used to design these cards until this point so this was the perfect opportunity.

Vintage Christmas Card
This is such an adorable and beautiful set - Vintage Christmas stamp set. 
I'm a sucker for those additional stamp sets that coordinate with a punch!


Cardmaking Tips & Supplies:
  • Finished size is 5" x 3.5"
  • When I'm making a large batch of cards, I gravitate towards using the Note Cards & Envelopes set because you already get 20 cards and 20 envelopes that are ready for you to make. This makes me giddy!
  • For the stitched rectangle frame, I recommend you think ahead of time and use cut out for another card. I used mine for the next Christmas Scottie Card below. After cutting out the frame, emboss it with the Leaf Fall embossing folder.
  • If you have a 3/4" circle punch, use it to punch out the "Happy Holidays" sentiment. Otherwise, you may look for a circle die that will be close enough to cut it out.
  • After stamping the background images, use the largest flower as a guide for placing your Vintage Bottle. Place a bow at the neck of the bottle then adhere another large flower that you will have to fussy-cut out. Don't forget to add some Wink of Stella for some shimmer and shine!
  • Below is a list of supplies that I used to create this card.


Christmas Scottie Card
I am partial to the Christmas Scottie stamp set because we have a male black mini schnauzer that looks just like the images in the set. Although we have a boy dog and was the inspiration of this card, it turned out to be a girl-dog card because of the Polished Pink I used throughout the card.


Cardmaking Tips & Supplies:
  • Again, when I'm making a large batch of cards, I use using the Note Cards & Envelopes set because you already get 20 cards and 20 envelopes that are ready for you to make.
  • Use the Stitched rectangle cut-out from the previous card to use on this card. Hard to tell in the picture but I did heat emboss some snowflakes on the background using clear embossing powder. 
  • The thin strip of ribbon that resembles a leash was cut from the Polished Pink Ribbon 

  • Below is a list of supplies for this card:


All in all, it was a much needed time away from the normal routine at home and sure as heck beats having Onstage Online! I missed the interactions between demonstrators and the fun we had together! And that was just the cherry on top! 

As demonstrators, we get the perk of pre-ordering products from the NEW 2023 Mini Catalog and Sale-a-bration brochure that's coming on January 5, 2023!!! I may have ordered a few extra products for my birthday 😉! It's always exciting to see those new products on display and in presentations!


Thanks so much for joining me this week and please don't hesitate to comment below if you are inspired by any swaps made from our demonstrators!

Until next time ...