Tuesday, February 22, 2022

#TGIFC356 - Sale-a-Brating with Awesome Otters

 Hello & Happy TWO's Day!

I've got a cute card to show you that features TWO fun stamp sets (see what I did there?!): Awesome Otters stamp set and the Special Moments stamp set from the Sale-a-Bration brochure.

This card was entered as part of this week's TGIF Challenge #356 - creating from the Sale-a-Bration brochure.

If you haven't "Sale-a-Brated" yet, you still have 6 days left to earn your FREE product(s) from the brochure with every $50 purchase thru my Online Store.

I chose to create a Birthday Otter card because who wouldn't want to celebrate their birthday with this adorable little otter?!


Cardmaking Tips

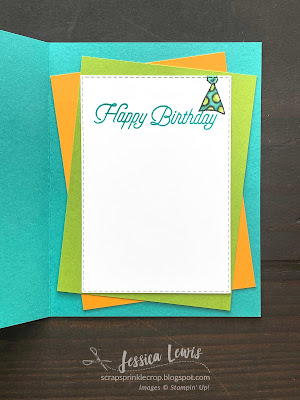
  • Use 3 1/2" x 4-3/4" pieces of Bermuda Bay Cardstock and also Granny Apple Green cardstock to layer behind the sentiment piece at different angles.
  • Use the Stitched Rectangles dies to cut out a 3" x 4 3/8" piece of Basic White cardstock.
  • Use your grid paper to help you align your sentiments as you stamp onto the Basic White cardstock with Bermuda Bay, Mango Melody, and Granny Apple Green. 
  • Layer a 2-7/8" x 4-1/4" piece of vellum on the sentiment piece to soften the bold sentiment colors.
  • Use your Light So Saffron (first layer) and Crumb Cake Stampin' Blends to color the little Otter.
  • The Otter's birthday hat was colored using Bermuda Bay and Granny Apple green Stampin Blends.
  • Color a piece of Black & White gingham ribbon with the Dark Bermuda Bay Stampin' blend and adhere as shown.
  • The balloons are from the Hippo & Friends Dies cut from Mango Melody and Bermuda Bay cardstock. Use a white gel pen to add a "glare" on the balloons.
    • The balloon "strings" were made by coloring the Playful Pets black and white bakers twine with the coordinating balloon color using Stampin' Blends.
    • Place a glue dot onto the otter's hand and stick the balloon strings on there as if he's holding the strings.
  • Add some Shimmer and shine to your Otter by placing some Shimmery Crystal Effects. Also add some Wink of Stella onto the otter's hat then finish the card front off with a few Iridescent Rhinestones.


Cardmaking Supplies

  • Click on the following link for a list of supplies used on this project. Please note that the Sale-A-Bration products (See below) and the Irridescent Rhinestones (unavailable) are not included: https://s.tamp.in/qPSjOC 
  • To earn your FREE Sale-a-Bration products, shop at my Online Store.


Thank you SO much for joining me! I do hope you are inspired to create a Birthday Otter card of your own!

Until next time ... 


Thursday, February 10, 2022

#tgifc354 Color Challenge using the Home & Garden bundle

 Happy Thursday crafty friends! 

I'm excited to share with you this week's creation using TGIF Challenges color challenge.


I'm so glad that these combination of colors were more on the masculine side and it gave me the opportunity to make my husband's birthday card! My husband is a handyman and he really truly can fix just about anything! I love this quality in him.

The Home & Garden Bundle was just the perfect set for me to use for his card!


This isn't an ordinary card but rather a shutter card. The magic of the shutter card happens when you slide off the belly band and open the two front flaps to reveal the covered center.


Cardmaking Tips:

  • I followed the dimensions for the essential pieces for the card in DIYBlaster's video.  
  • The overall card size measures 4-1/4" x 5-1/2". The Smoky Slate card base is 5-1/2" x 8-1/2" and scored 2-1/8" from each end. 
  • Cut 2 Soft Sea Foam hinge pieces to 4" x 3-1/2" then score at 1/2" along the short end. These are then flagged on the ends by marking the center with my pencil as shown below. Be sure to erase those pencil marks after you're done. Place a strip of Tear and Tape onto one end for each hinge piece.

  • Decorate a 2 1/2" circle to adhere onto the inside of the card, behind the hinge pieces.
  • Use a Simply Marbleous piece of DSP that measures 3" x 5-1/2" then punch out a 2" circle in the middle using your circle punch. The best way to adhere this piece is by using a very thin line of Tombow Glue at the top and bottom edge of this piece so it give your shutter part to open and close easily.
  • for the brackets, use the darker shade of the Silver Foil paper pack.
  • For the Card Front
    • Use your Soft Sea Foam Ink Pad to place the ink directly onto the Brick & mortar embossing folder so that ink transfers to your Basic White pieces (2 pcs - 2" x 5 1/4")
    • The Soft Sea Foam belly band measures 1 1/4" x 9 1/4".
    • Stamp the shovel and the scissor images onto a piece of the Simply Marbleous DSP with your Memento Ink. The handles were colored with the LT and Dk shades of Soft Suede Stampin' Blends.
    • The scissor was a little tedious but I poked a hole on one end and inserted a small length of Linen thread then tied a knot so it would hang from the bracket.
    • The ladder image was stamped onto a piece of Silver Foil using StazOn ink
    • For the sentiment, stamp it on Basic Black cardstock then heat embossed it with White embossing powder and cut it into 3 separate pieces as shown.

This one took some time for me to assemble because I kept messing up. It is worthy of doing a video tutorial for, however, I cannot get it done this week. I just may upload one next week.

Cardmaking Supplies:

  • Please click on the following link to view the list of supplies used, minus tools and adhesives and the Simply Marbleous DSP: https://s.tamp.in/8pabq2 
  • Click on the following links for more information about the Sale-a-bration DSP I used, which can only be earned for FREE with a $50 or more purchase: 


Thank you for joining me! Hope you enjoyed this week's creation!

 Until next time ... 


Tuesday, February 1, 2022

Nuts & Bolts Birthday Slimline Card

Hello crafty friends and a very happy February 1st to you!

I've got a birthday card for you this week. This one I created for my sweet brother using the Nuts & Bolts stamp set along with the Slim Sayings stamp set and coordinating Slim Card dies. I'm always in need of making masculine cards and they are a challenge to make!


It seems appropriate to use the Simply Marbleous DSP from the Sale-a-bration brochure for these robots, doesn't it? This is a good way to get that metal look.


 Cardmaking Tips:

  • Use Misty Moonlight cardstock for the cardbase which measures 3-5/8" x 8-5/8".
  • Since the Simply Marbleous DSP is only 6"x6", I had to extend the paper for the background piece and the frame by adhering 2 separate pieces together. You really can't tell where the seams are unless you inspect it very closely.
  •  Those cute little robots were stamped onto the backside of the Hydrangea Hill Mercury Glass Acetate with Stazon ink then fussy-cut. I then cut out the same robots on Pool Party Cardstock and adhered them behind the acetate.
  • Trim off the gear that the robot is holding and extend the line from below his hand towards the top to make it look like he's holding a balloon. I used an 1/8"x 1" strip of the Hydrangea acetate then drew a line with my black sharpie pen. 
  • Those adorable little party hats are from the Awesome Otters stamp set from the Sale-a-bration brochure. Use the Smoky Slate, So Saffron and Balmy Blue Stampin' Blend markers to color the hats.
  •  Finish off the card front with a few black Adhesive Backed hexagons on the top left and bottom right corners to look like rivets.
  •  Be sure to keep your scrap pieces you cut from the Simply Marbleous DSP so you can use them throughout the card as you see on the inside piece in the picture below.


Cardmaking Supplies:
 
 I really appreciate you joining me this week! I would LOVE to hear from you about your thoughts on this card in the comments section below! 
 
Until next time ... 
 

Monday, January 24, 2022

#TGIFC352 - Masculine Valentine card

 Hello crafty friends! 

I've got a card to show you that was inspired by TGIF Challenge #352 and features a NEW bundle that will come out on Tuesday, February 1st called "Here Together".


I'll be sure to share more on the NEW bundle next week but until then, here's a sample using the bundle amongst other products as described below.

I wanted to make something masculine to give to my husband just in time for Valentine's Day! I'm already ahead of the game and I'm so glad I got around to it.


Cardmaking Tips

  • The finished dimensions are 4" x 4".
  • Use a piece of Pool Party cardstock that measures 8" x 4" and score at 4" along the length,  as your card base.
  • Use another piece of Pool Party cardstock that measures 3.5" x 3.5" and zip it through the Stampin' Cut & Emboss Machine with the Gingham Embossing Folder.
  •  use a 3-1/4" x 3-1/4" piece of the Simply Marbleous DSP to crumble up and distress the edges. Sponge some Soft Suede ink on all four sides. The DSP can ONLY be earned through our Sale-a-bration promotion.
  • Cut a heart out from the same DSP using the large heart-shaped die from the Give It A Whirl Dies. Adhere the heart to the center of the square DSP piece.
  • Stamp the hands image onto some Basic White cardstock using Soft Suede Ink. The color of the hands are from the NEW Natural Tones Stampin' Blends Pack (SU600, SU700) that are a part of the "Here Together" collection. Use a little Cherry Cobbler marker to color the nails on the hands.
  • Use your Dark Pool Party Stampin' Blend to color the black and white twine from the Playful Pets ribbon combo pack. Wrap it around your large DSP square 3 times and tie with a bow.
  • Stamp "Sure do love you" onto a 1/2" strip of Soft Suede cardstock with Versamark and heat emboss it with White embossing powder.
For the inside of the card, I used the banner shaped die from the Sweet Hearts Die set and heat embossed the sentiment with white embossing powder. The sentiment and the hearts are from the Sweet Conversations Stamp set. 

All the supplies, minus the Simply Marbleous DSP and the Here Together Collection (coming 2/1/22),  can be found in the following link:  https://s.tamp.in/AAeFlf

The Simply Marbleous DSP can only be earned for FREE after a qualifying order of $50 or more during Sale-a-Bration. Click here for more details.

Thanks so much for joining me this week! Don't hesitate to comment below and let me know your thoughts on this card! I'd love to hear from you.

Until next time...