Saturday, November 22, 2014

Thanksgiving - Texas style

Goodness! I knew I hadn't updated my blog for a while but never realized it's been almost 1 month. Life sure does get hectic, doesn't it?

November is one of my favorite months because I get to look forward to spending time with my family that is a long distance from where I live. Plus, it's my birthday month =o)

Speaking of birthdays, I've had the opportunity to create a card for a male co-worker who's birthday so happens to fall on Thanksgiving day. I thought it would be the perfect time to do some turkey punch art!
CARD FRONT - 4.25"x5.5"
 Some of you may recognize this turkey from last year's turkey punch art blogpost. I so happened to have kept my extra pieces that I punched out and put together another little turkey. Do you see anything different about this turkey? Yes! it's a Texas turkey, complete with a cowboy hat and a "sheriff" badge. I LOVE it!

My tips:
  • use the Yee-Haw stamp set to create the 3-D cowboy hat. I stamped the hat onto early espresso cardstock and cut it out by hand. Stamp it again to cut out the bottom portion of the hat and adhere with a small piece of dimensionals.
  •  stamp the cowboy hat onto a piece of Color me Autumn designer paper. Cut it out and glue onto the band area of the cowboy hat.
  • The sheriff badge was created using the FRONT COVER of the Yee-Haw stamp set. It was the perfect size I needed for the turkey. I used a piece of carbon paper to trace the badge onto my white cardstock and cut it out. Color in between the lines with coordinating Stampin' write markers.

FINISHED INSIDE OF CARD


Supplies Used:

Saturday, October 25, 2014

Get well soon card

Hello to you! I've been having to work on quick and easy cards lately and would like to share a get well card I made. The card layout is cased from Amanda Burditt. Her card is shown below.
 

I particularly love the masculine look to this card with the combination of colors and textures. The hand drawn frame is what brings it all together.

Here is my version of a masculine get well card.


 My Tips:
  • in order to create the hand-drawn border, use a ruler and pencil and lightly draw the border. Then use a white gel pen to trace over the pencil lines. Make sure to erase any stray pencil marks.
  •  I used the small scallop cutting blade withe the stampin' trimmer.
  • use the chevron punch in coordinating colors for the arrows.


Supplies Used:


Hope you enjoyed today's quick post! 
Until next time....

Tuesday, October 14, 2014

Babies, babies, babies........

For the past month, I have been a very busy lady trying to keep up with all the baby cards that I have to make. I really feel like it's baby season right now. I have 6 friends right now that will be having a baby soon.

I got to enjoy some alone time, just me and my crafting desk. It has been a fun and sweet time! Allow me to share what I've created lately....

With the limited amount of time I have, I decided to go with some caseing from the catalog. The first card I created is CASEd from page 80 of the Stampin' UP! catalog as shown below.


Below is my version of this card. While the Sweetest Gift stamp set is already retired, I am limited on baby stamp sets so that's why I chose to use this set.


 MY TIPS:
  • I used the leftover circle that you punch out of the Daydream Medallions stamp set as my polka dot background.
  •  Stampin' UP! markers are my favorite when it comes to stamping in different colors. Simply color on the lines of the stamp in the color you desire and give it a little huff before you stamp. I did the same thing with the banner with the phrase and the mobile on the inside of the card (shown on the right).


Supplies Used:


 The next card I created and cased is from pg 104 of the catalog.


      Here is my version.
MY TIPS:
  • I made the purple striped frame larger than the one in the catalog. 3 1/4"x4" to be exact.
  • no ribbon in the color you need? try using an embossed piece of cardstock as I did below the "adorable baby" phrase.
  • now that I look at it, I'm going to have to add another flower & an embellishment somewhere to add to it...

SUPPLIES USED:

Thanks for stopping by! Until next time....

Thursday, September 11, 2014

Stampin' UP! updates

Top of the day to you! I just want to share a few new and fun things with you today.

"Yee-haw" photopolymer stamp set
Yee-Haw! Dust off those boots, shine up your spurs, and figure out where you left your ten-gallon hat because with the 25-piece Yee-Haw photopolymer stamp set you can really let your cowboy (or girl) flag fly! 

Recommended clear block sizes are A, B, C, D, & H (not included in the set).


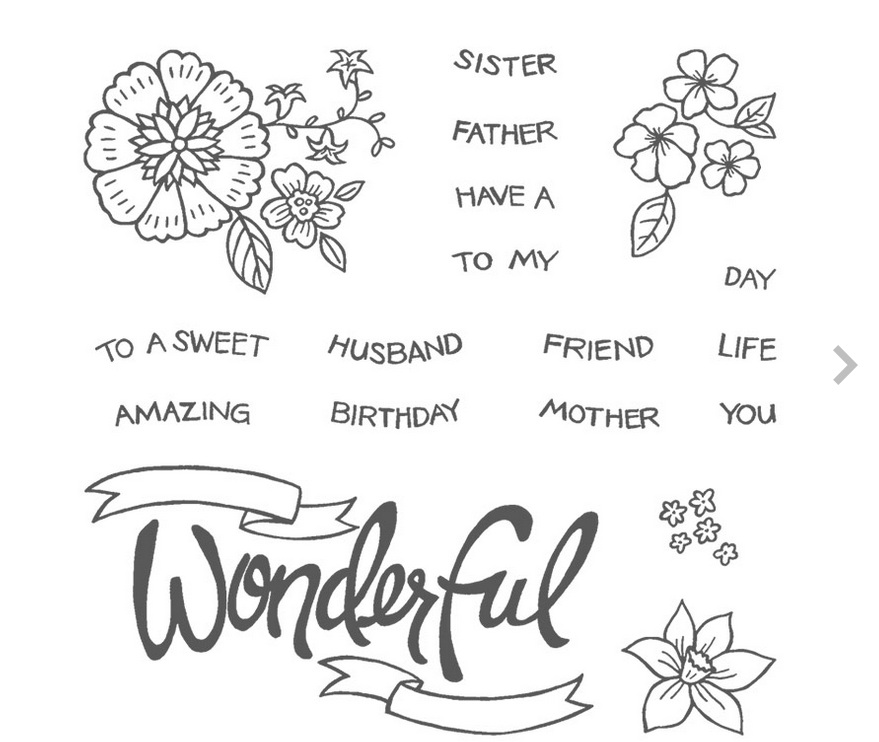
"You're wonderful" stamp set
You’ve got lots of wonderful people in your life, and the You’re Wonderful Photopolymer Stamp Set will help you tell them so! This 18-piece set gives you tons of options to help you match the perfect sentiment with the occasion and recipient of your choice.

Recommended clear block sizes are A, B, C, D, F, & G (not included in the set).

http://www.stampinup.com/ECWeb/ProductDetails.aspx?productID=139158


Weekly Deals
Every Tuesday, SU! brings you a new set of deals on a selection of fantastic products. Check out my Online Store each week to see what's on sale and take advantage of these great deals before they're gone! 

Here's this week's deals:

http://www.stampinup.com/ECWeb/ItemList.aspx?categoryid=1634


To order any of the above or view the latest and greatest of Stampin' UP! products, go to my ONLINE STORE. You are also welcome to contact me with any questions you may have.

Until next time...