Hello Everyone!
I'm back to share with you some sneak peeks of the exclusive and early-release Quite Curvy Variety Bundle. The samples I'm about to show you will become available to customers beginning Tuesday, November 3rd.
The Quite Curvy products are a part of the upcoming January-June 2021 Mini Catalog.
I decided to make 3 different projects using this bundle that I was able to get first dibs on, as part of the SU! demonstrator benefits.
Card 1 - Fall Birthday
I just love the fall weather and couldn't wait to put a "slim-line" birthday card together.
I was inspired by a fellow demonstrator, Yvonne Spikmans, and decided to CASE her card as shown below. It's a stunning card, don't you agree?
Below is my version of the card. Like I mentioned above, this is a "slim-line" card and used the retired pigment sprinkles to create the colorful fall leaves. The finished card measures 3.5" x 8.5".
STEP 1: Use a piece of Watercolor Paper and generously mist it with water. Sprinkle red, orange, green and yellow pigment sprinkles randomly over watercolor paper. If you don't have pigment sprinkles, use a watercolor brush and some ink to watercolor the paper. I was too impatient to let it dry so I took a paper towel and set it over the watercolor paper and rubbed the paper towel with my hand to absorb the extra water (image on right). Set aside to completely dry.
STEP 2: Cut a piece of Thick Whisper White Cardstock to 7" x 8.5" and score the 7" side at 3.5".
STEP 3: Cut a piece of Cinnamon Cider Cardstock to 3 1/16" x 8 1/16" and set aside.
STEP 4: Cut a piece Whisper White Cardstock to 2.5" x 8". Use the dotted curvy die to cut midway the cardstock piece (You'll have to run it through your machine twice since the cardstock is longer than the die). Then use the Wrapped in Texture embossing folder to emboss the two pieces (you'll have to run it through your machine twice since the cardstock is longer than the embossing folder).
STEP 5: Use the embossed white cardstock pieces to mark where you want to stamp the sentiment. Use versamark and white embossing powder to heat emboss the sentiment.
STEP 6: Stamp the leaves onto the dry watercolor paper from Step 1 using Black Stazon Ink then cut out with die.
STEP 7: Begin assembling your card by adhering the Cinnamon Cider piece to the center of your card front. Then adhere the white embossed cardstock pieces onto the Cinnamon Cider piece such that you have 1/16" of border around.
STEP 8: Trim the leaves such that you have different lengths as shown on the card sample.
STEP 9: Stamp the three different bird images using Memento Ink onto a scrap piece of whisper white cardstock. Color the birds using the following Stampin' Blends: Cinnamon Cider, Cherry Cobbler, Mango Melody, Crumb Cake. Adhere birds using dimensionals onto card front.
STEP 10: Finish the front with a few Elegant Faceted Gems placed randomly over card front. Also use a little Wink of Stella on the breast of the birds for a slight touch of shimmer.
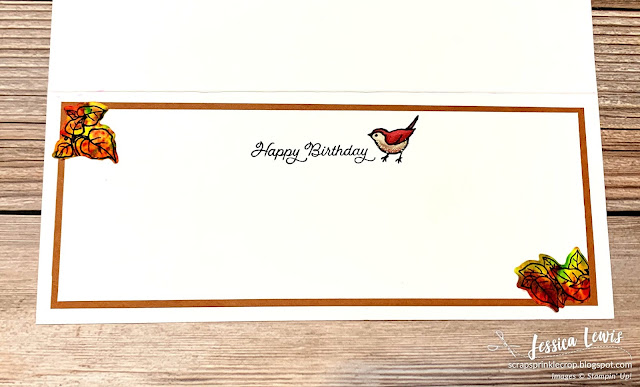
STEP 11: I like to finish my cards on the inside and used a couple of leftover pieces that I trimmed off for the leaves and placed it inside of the card. The "Happy Birthday" sentiment comes from the Posted For You stamp set.- PAPER/CARDSTOCK: Granny Apple Green designer series paper (dsp), whisper white CS, real red CS
- INKS: memento black, versamark
- STAMPIN' BLENDS: Misty Moonlight combo, Granny Apple green combo, Mango Melody combo, Gray Granite combo
- STAMPS: Quite Curvy (coming Nov. 3rd), Forever Fern (for the "You can do this" sentiment on inside of card)
- DIES: Curvy (coming Nov. 3rd)
- EMBOSSING FOLDER: Tasteful Textile
- White embossing powder
- EMBELLISHMENTS: Wink of Stella, Elegant Faceted gems
Card 3 - Made with Love
This last card sample is not a slim-line card. I decided to go back to a traditional 4.25" x 5.5" card size.
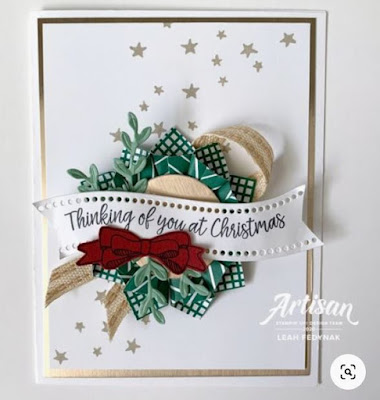
I CASED a beautiful card I found on Pinterest by Artisan Design Team Member, Leah Fedynak. I just love her card and all the elements she included in it! I can't help but CASE-ing cards that inspire me!!!
Here's my version of the card. It's not a as gorgeous as Leah's version of the card but I still think it's cute in it's own way. You definitely wouldn't be able to fit this in a flat envelope, instead you could use a clear acetate box to deliver to that special someone.
The most labor intensive part was the little paper ornament. I put it together as Leah described on her blogpost.
- PAPER/CARDSTOCK: Classic Christmas designer series paper (coming Nov.3rd), whisper white CS, Cherry Cobbler CS, Shaded Spruce CS, Brushed Metallic CS
- INKS: Shaded Spruce, Cherry Cobbler
- STAMPS: Quite Curvy (coming Nov. 3rd)
- DIES: Curvy (coming Nov. 3rd)
- RIBBON: Gold Cord (from Wonder of the Season ribbon combo pack)
Be sure to check back on November 3rd at my Online Store for the new release of this Quite Curvy Variety Bundle! It's so much fun to play with and the designs are limitless!
I do hope you've enjoyed these card samples that give you a peek at the Quite Curvy bundle!
Until next time...


