Welcome to today's Blog Post!
Let's get to the first item of business.... the WINNER of my last blog post for the Gilded Autumn Designer Series Paper, is
Karen !!!! Congratulations!
Karen, please e-mail me (by clicking on "email me" button on right side of page) your mailing address so that I may send your prize to you.
Along with today's blog post winner, allow me to share with you about the Trimming the Town Suite from page 24 of the 2020 Holiday Catalog.
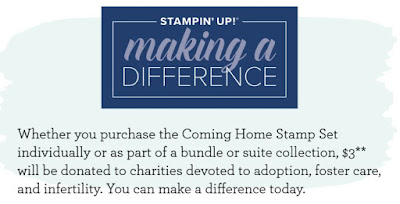
There is something REALLY special about this Suite... It is part of the "Making A Difference" mission that Stampin' UP! has.
I absolutely LOVE the missions that Stampin' UP! has in order to make a difference around the world. I am so thankful that their heart is to help those that are devoted to adoption, foster care, and infertility!!! This is simply A.W.E.S.O.M.E.! According to the most recent federal data, there are currently more than 400,000 children in foster care in the United States alone. My heart aches when I hear this statistic and I encourage you to consider Making A Difference in this mission by purchasing the Suite OR the Bundle (stamp set + dies).
I purchased the Trimming the Town Suite Collection not only because it's an adorable collection of products, but because by purchasing the suite, Stampin' UP! will donate towards these charities.
My project that I created using this suite doesn't necessarily pertain to Christmas. It's actually a card geared for my son's teachers, whom I want to feel appreciated for the extra difficulties they are having to endure this year due to COVID-19 regulations within the school.
Here's the front and inside view of a single card:
Here are a few tips to make the card:
- In order to make the "school house", you will need to trim off the chimney from the largest house image.
- The car image in this stamp set faces to the right and so I wanted the reverse of that in order to have the car going towards the "school". In order to accomplish this, I stamped the car image onto my silicone craft sheet using Memento Black Ink then placed a piece of whisper white cardstock over it,rubbed it, to transfer the image.
- I did a little Punch Art to make the sun image. I used two punches: the Medium Daisy and the 1" circle (retired). Simply follow the quick tutorial I created below:
- I used the label below from the Tasteful Labels Dies for the sentiment and trimmed it as shown.
- Cardstock: Whisper White Cardstock, Old Olive Cardstock, Bumblebee Cardstock, Smoky Slate Cardstock, Poppy Parade Cardstock
- Designer Series Paper (DSP): Trimming the Town
- Inks: Early Espresso, Memento Black
- Markers: Stampin' Blends Combos (Light & Dark) - Old Olive, Poppy Parade, Pool Party, Bronze, Misty Moonlight, Smoky Slate
- Stamp Sets: Beautiful World (for sentiment), Tasteful Labels
- Stamp & Die Bundles: Coming Home
- Punches: medium daisy, 1" circle (retired)
- Ribbon: 1/4" Early Espresso Faux Suede Trim
- Tools: silicone craft sheet, Stampin' Seal, Bone folder, glue dots, dimensionals, paper snips, take your pick tool, Stampin' Cut & Embossing Machine
This is all for today! Please feel free to ask me any questions!
Until next time...


